Trigger online actions with Make
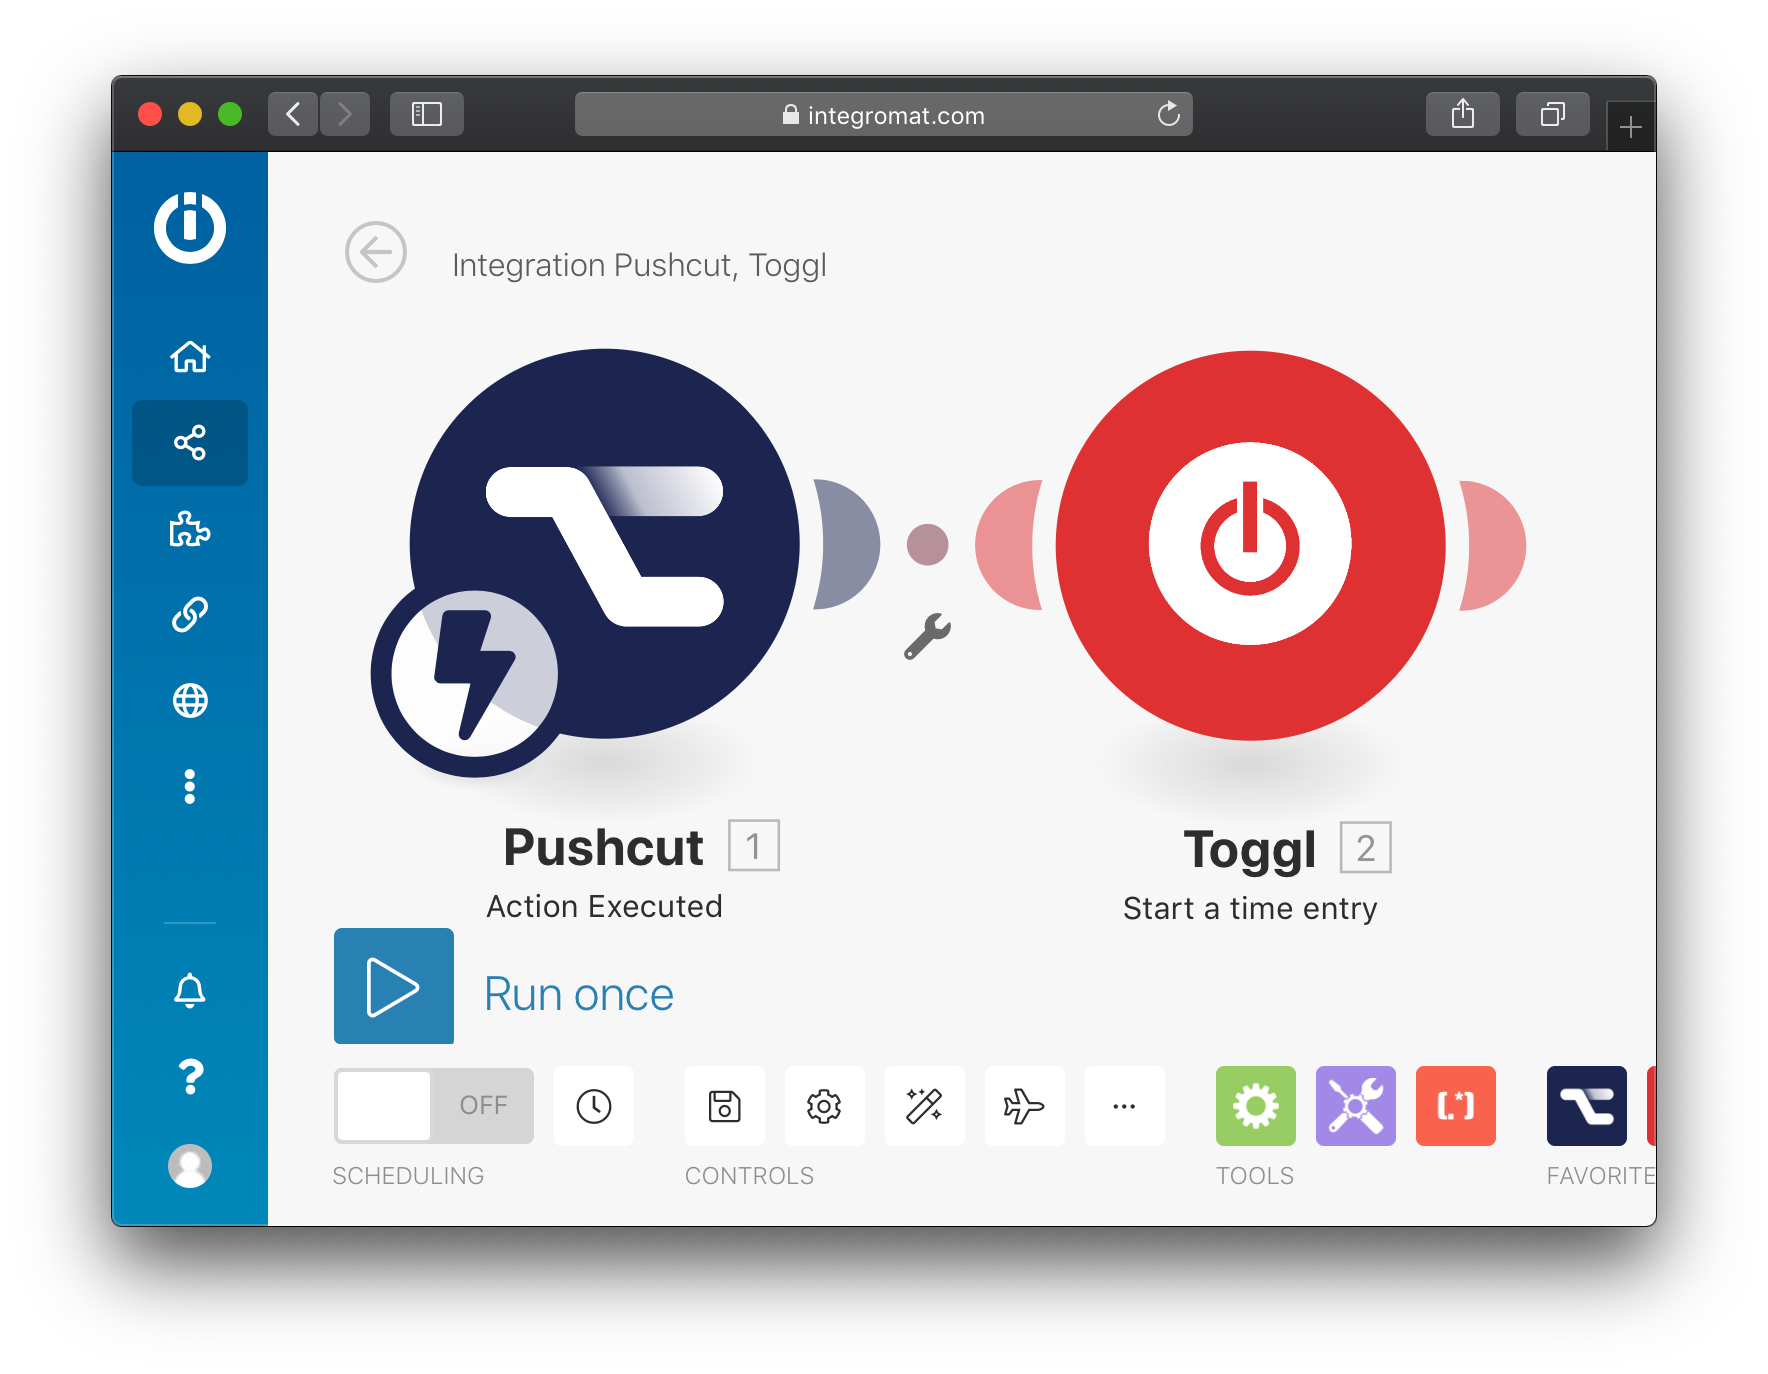
Step 1: Create an Make scenario
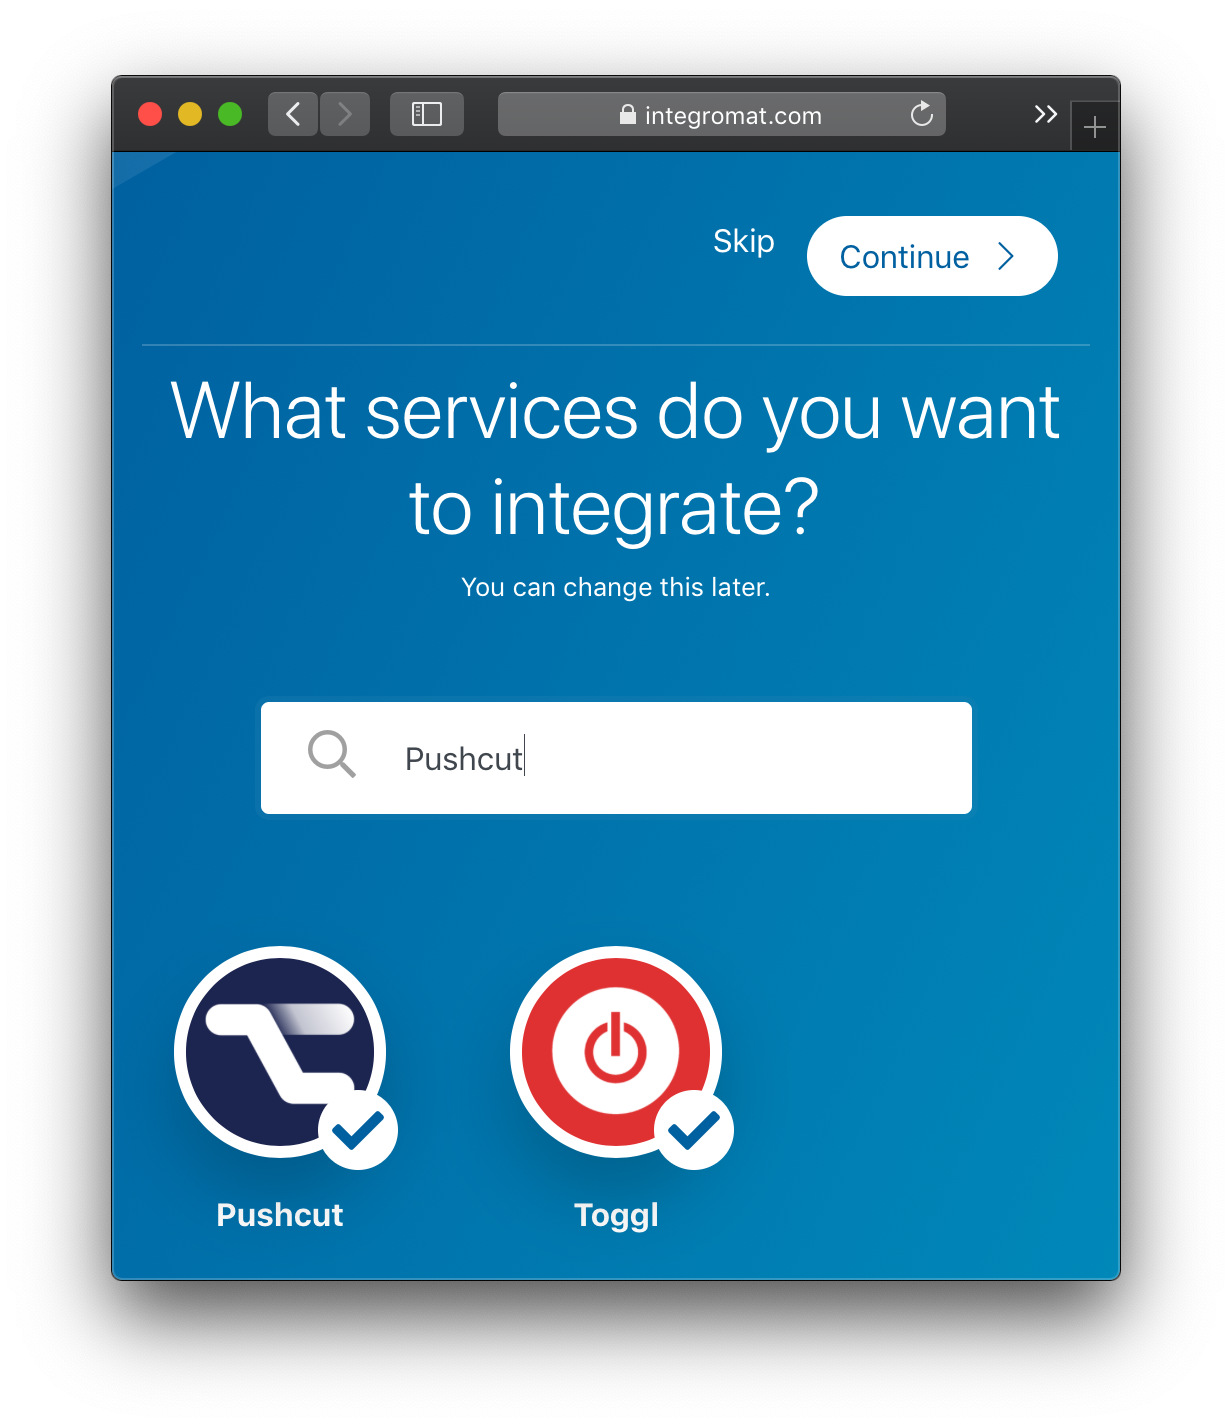
Go to Make.com (formerly Integromat) and create a new scenario.
Select Pushcut and Toggl as services to integrate.
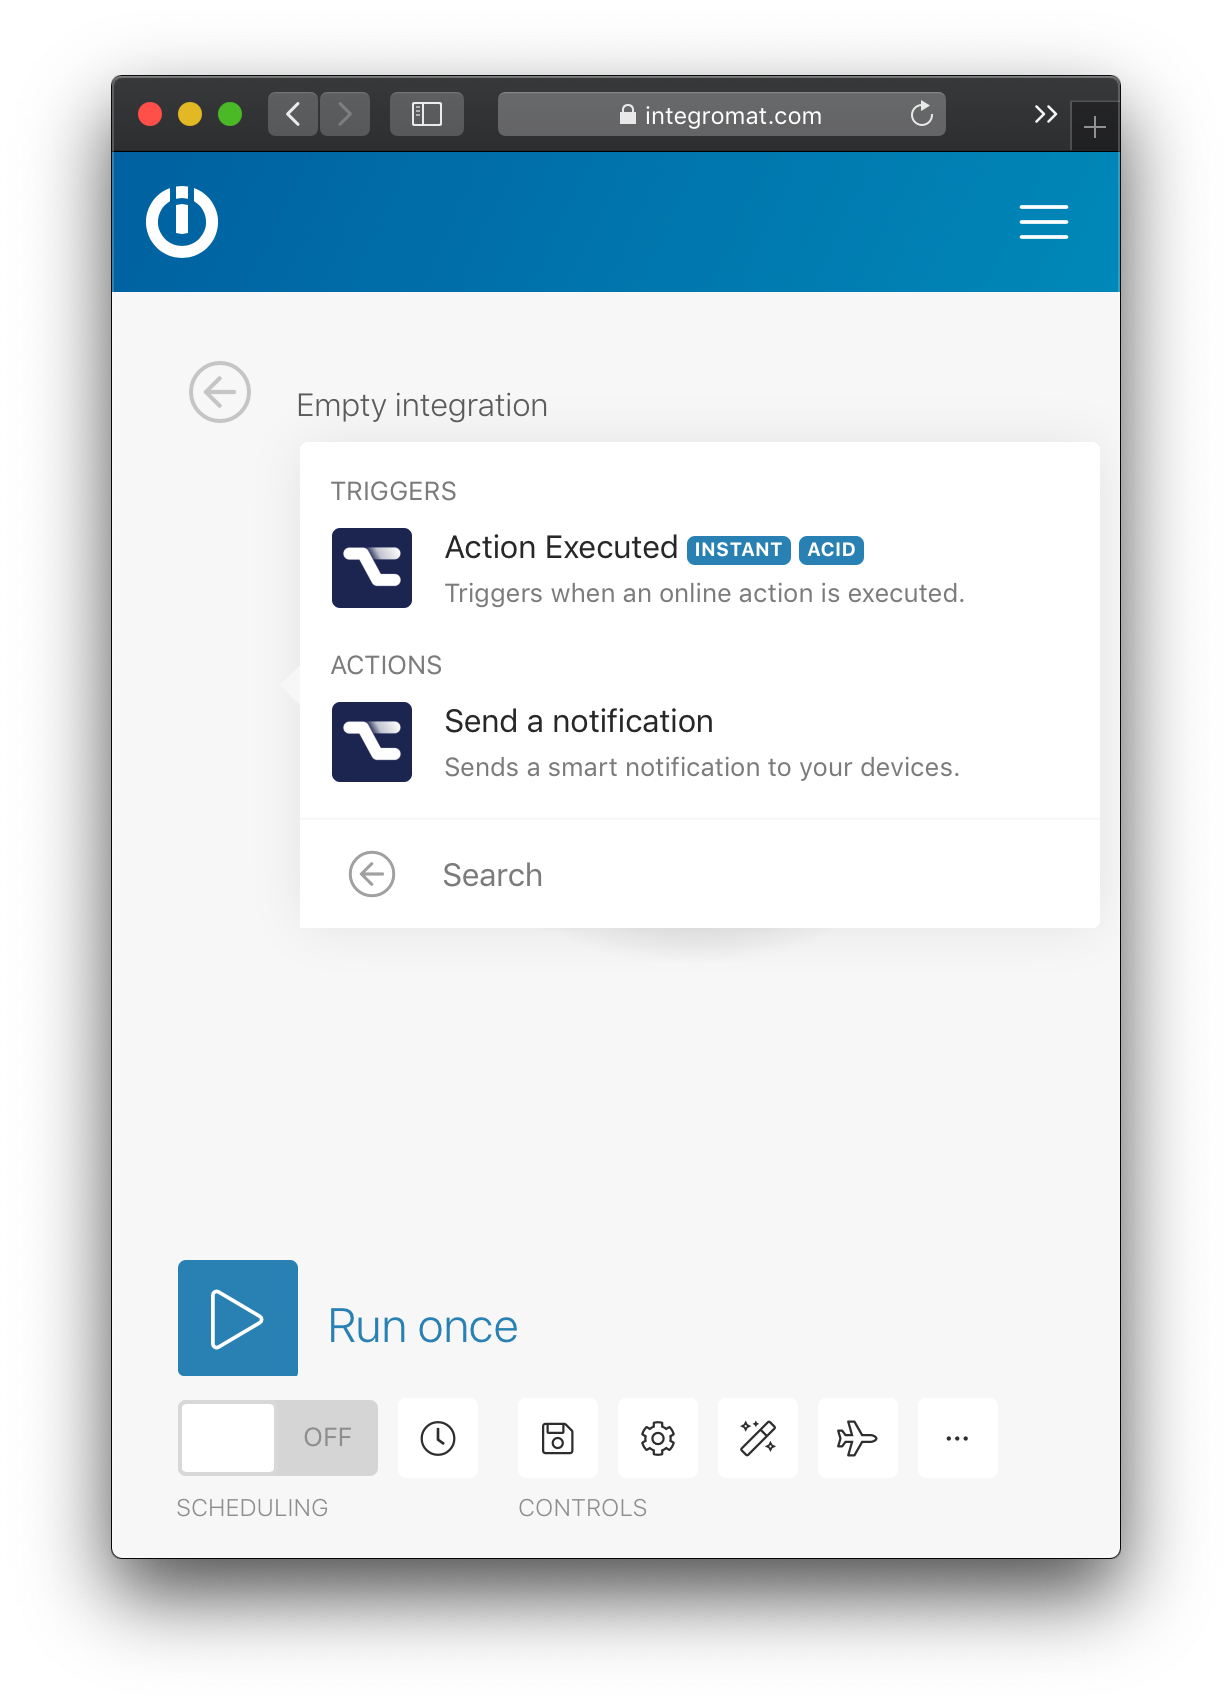
Step 2: Select Pushcut as trigger
Use the Pushcut module and select Action Executed as trigger.
Tap Add Webhook.
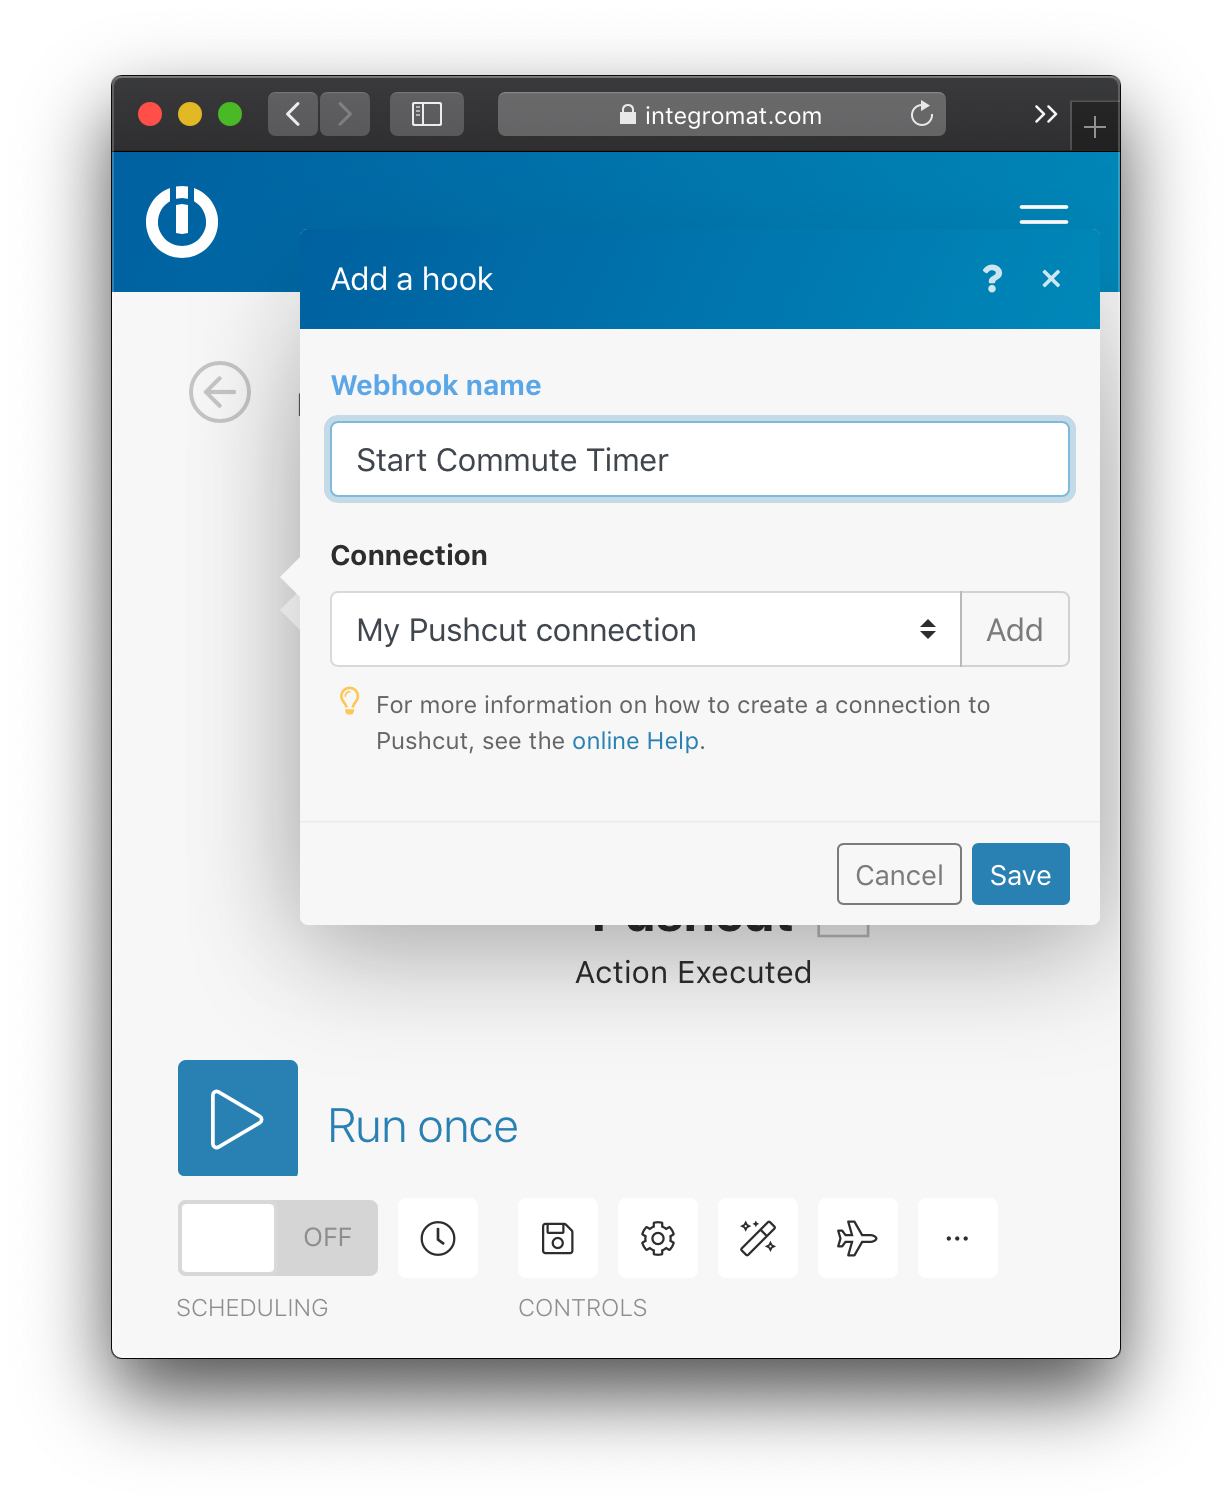
Step 3: Connect to Pushcut
Connect to Pushcut by clicking Add in the Connection field.
Scan the QR code with the Pushcut app (Account > Scan Code) and tap Allow to create the connection.
Choose a meaningful text as a Webhook name. It will be displayed as Online Action in Pushcut.
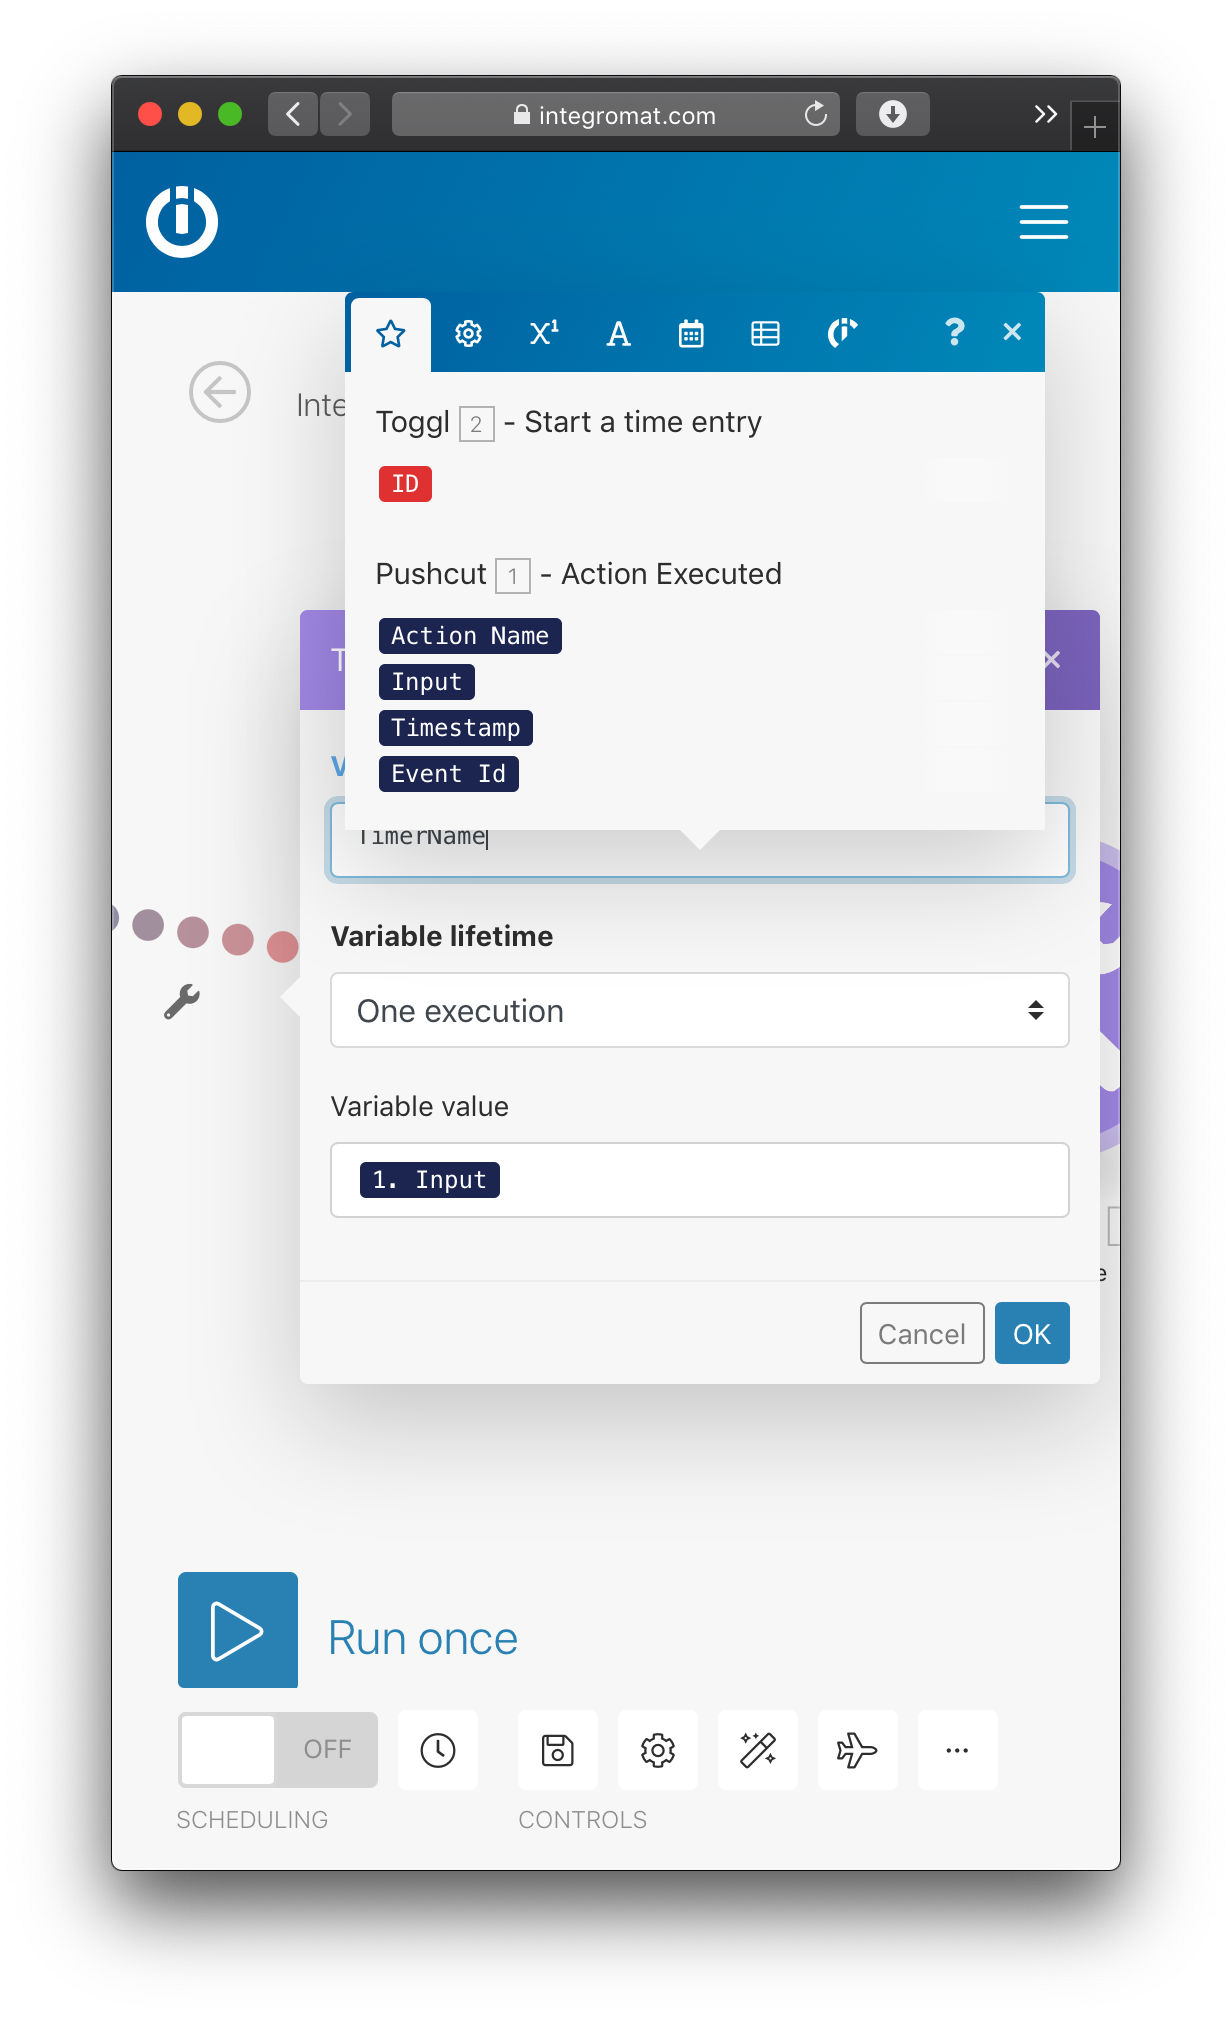
Step 4: Add Toggl action
Click Add another module in Make and select Toggl > Start a time entry.
Use the editor to configure your Toggl timer.
Your online action is all set up!
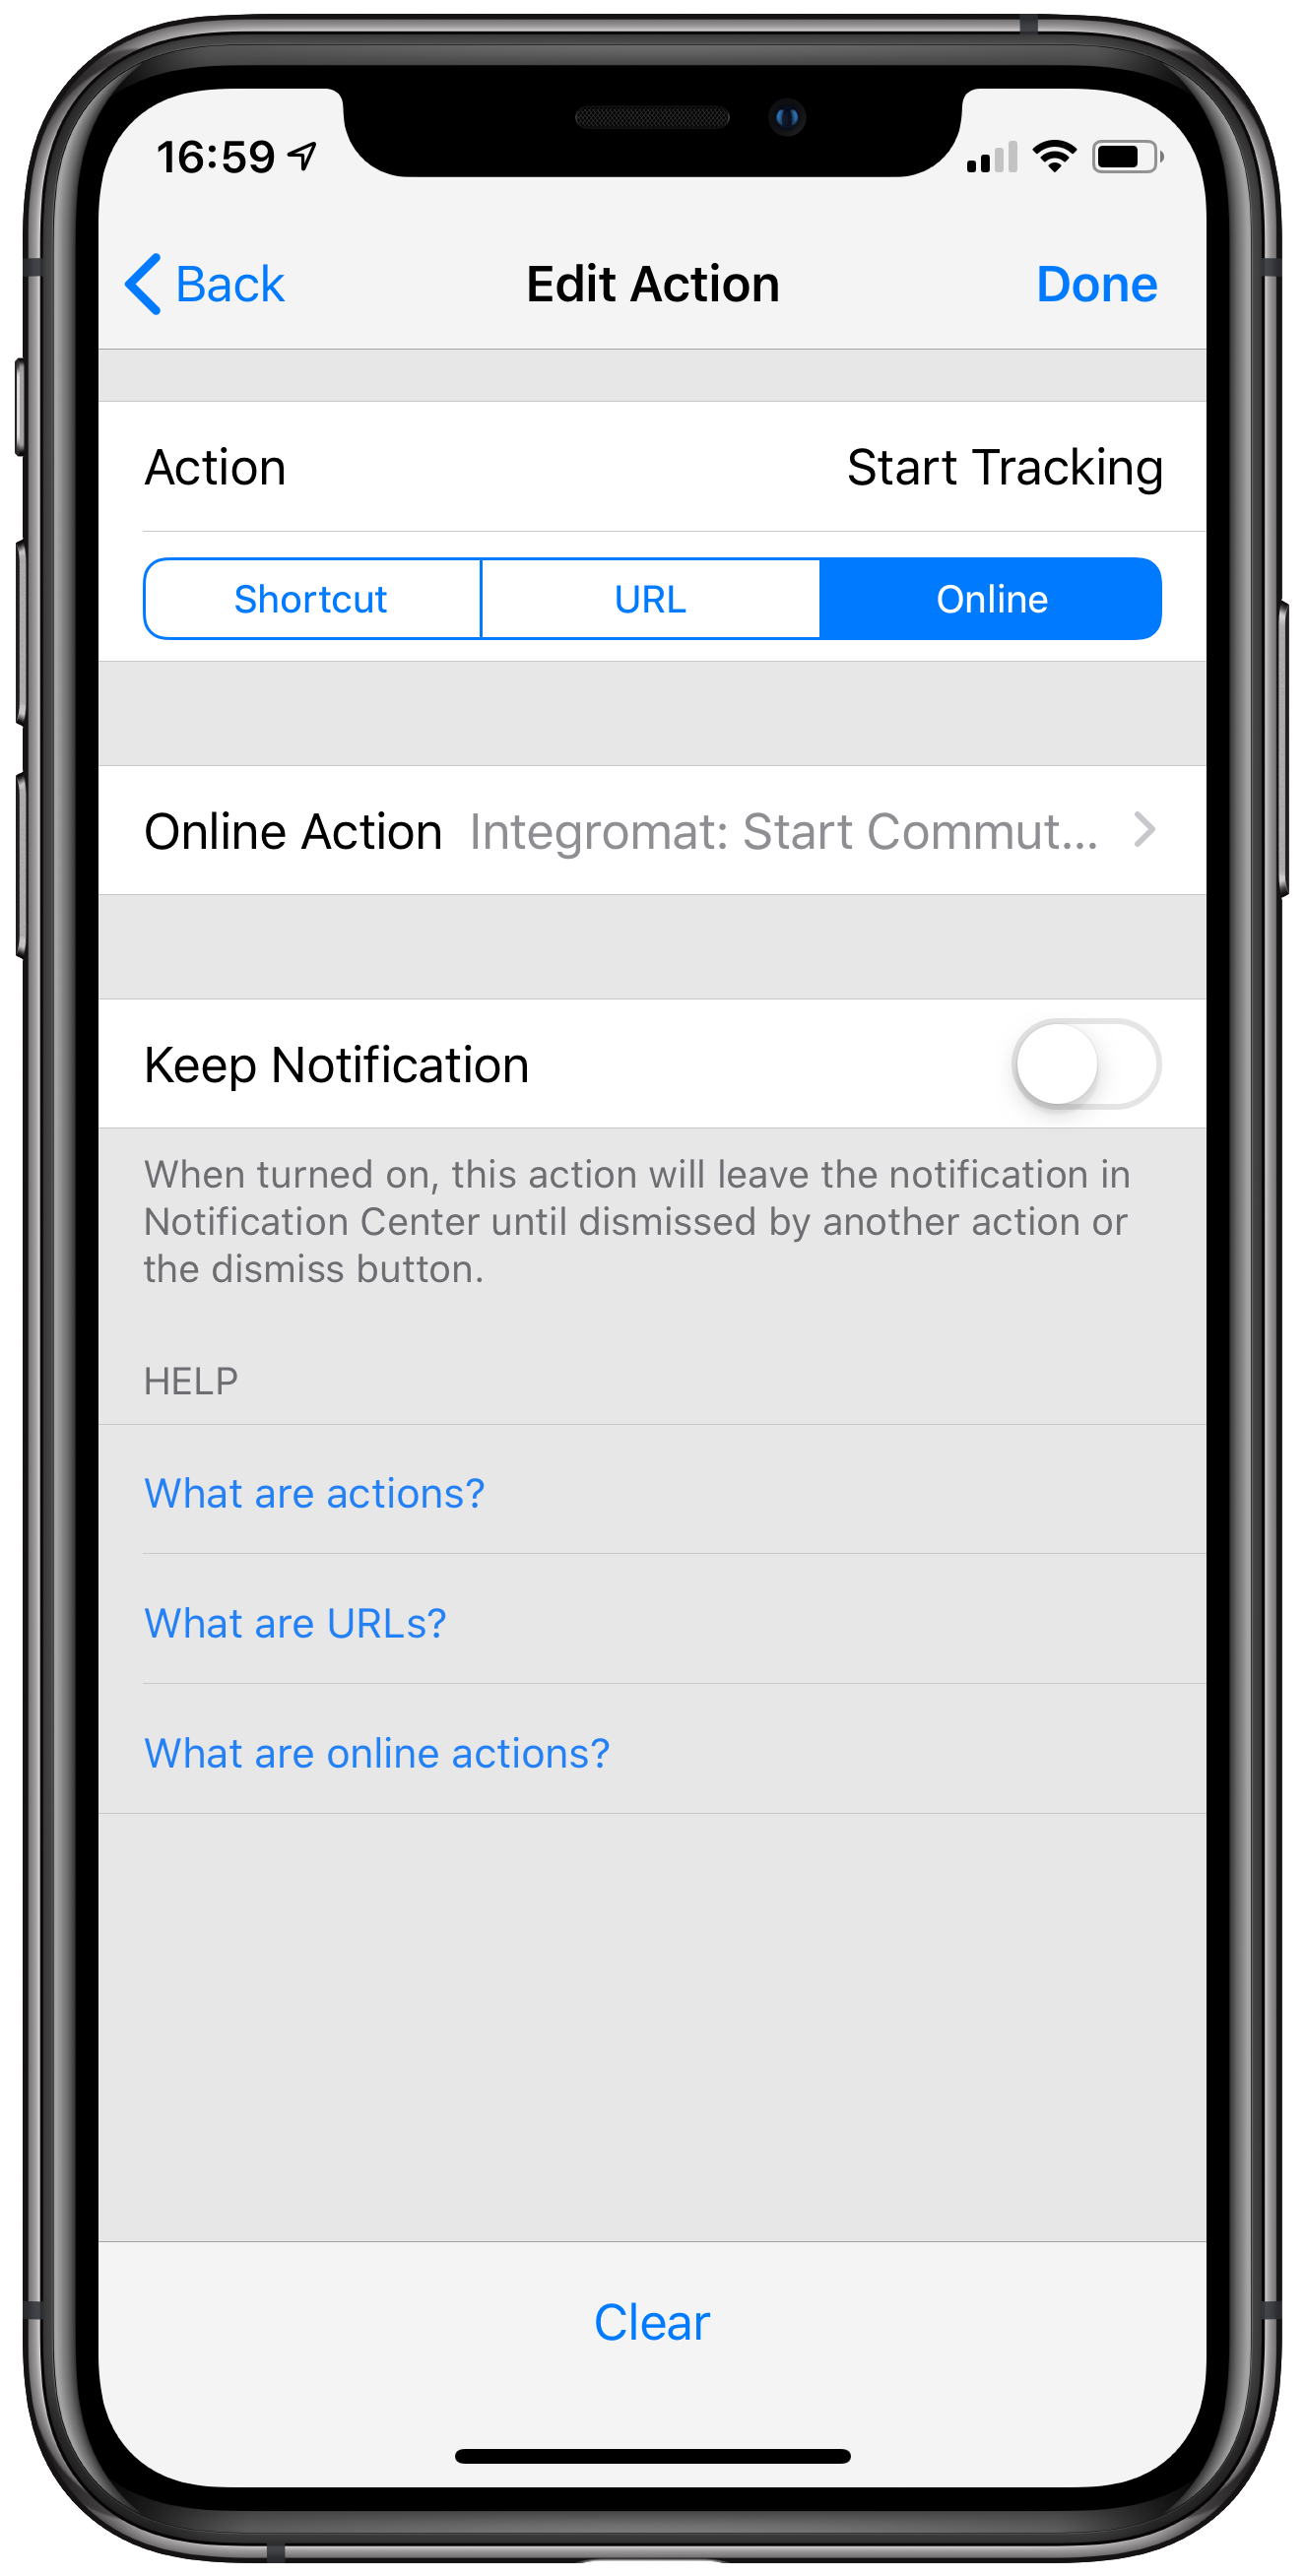
Step 5: Define a Pushcut notification
Create a new notification in the Pushcut app by tapping the Add button.
Assign name, title and text to your liking and tap Add Action.
Select Online and choose the Make webhook you created before from the list.
Tap Done and Add to save your notification.
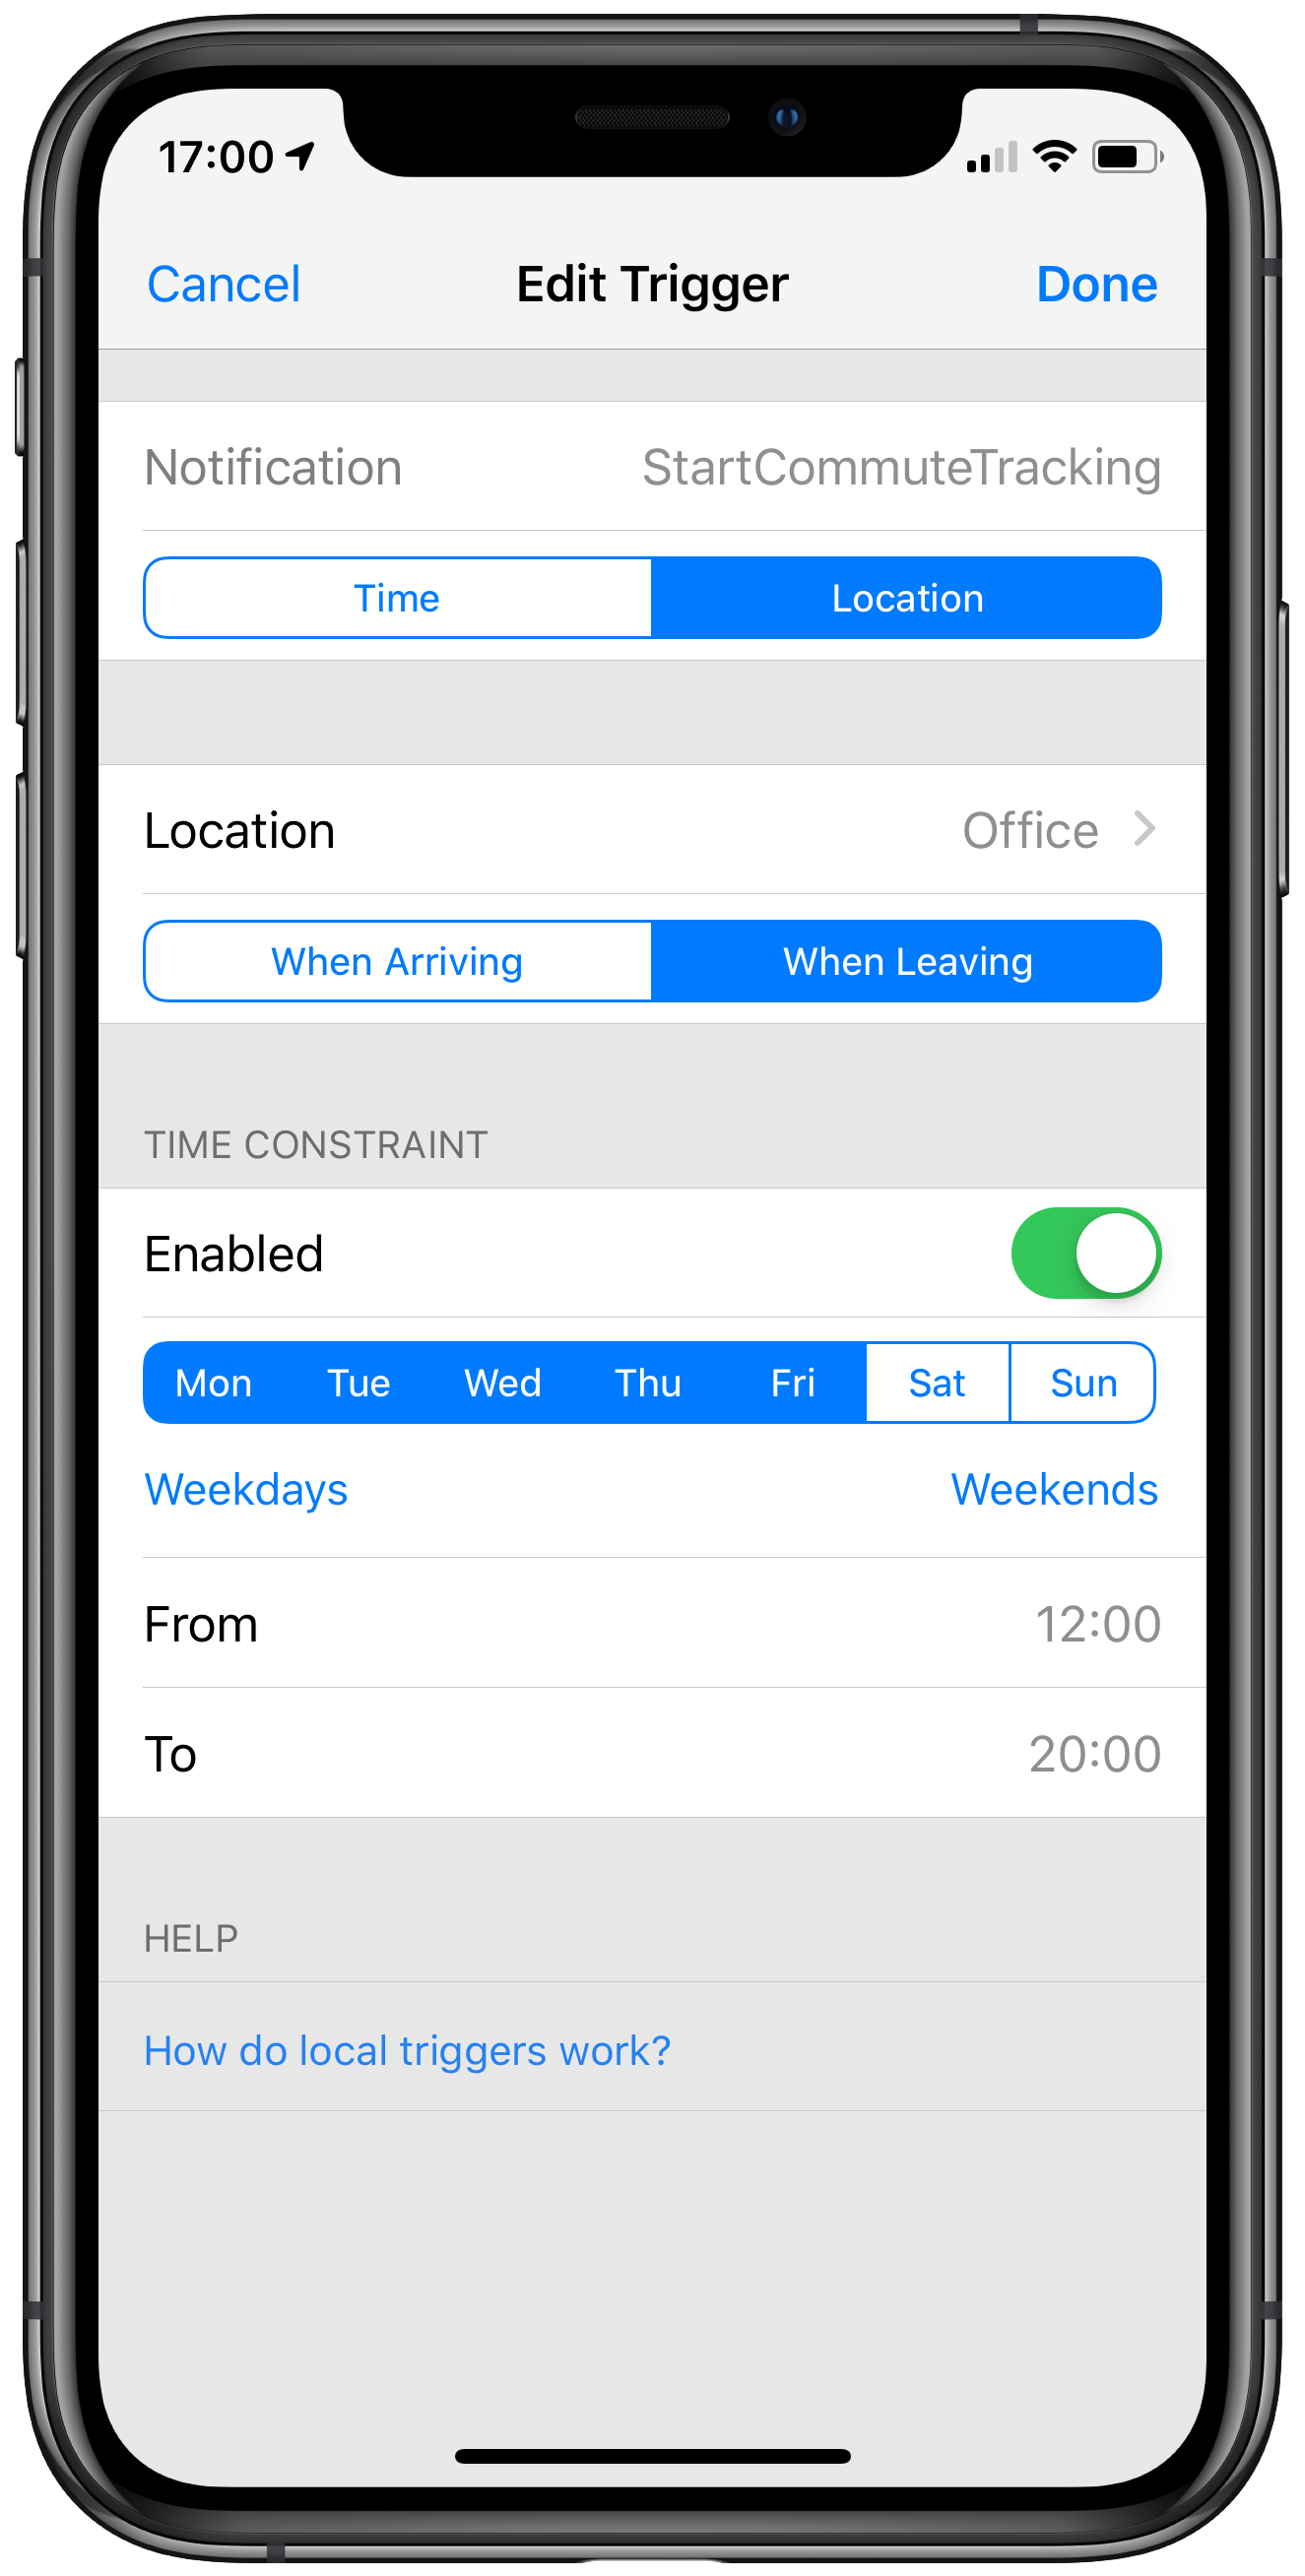
Step 6: Setup a location trigger
Scroll down to the Local Triggers section and tap Add Trigger..
Select Location and choose your office as a map region or iBeacon.
You can also specify a time constraint, like only on Weekdays between 12 and 8 PM.
Tap Done to save the local trigger.
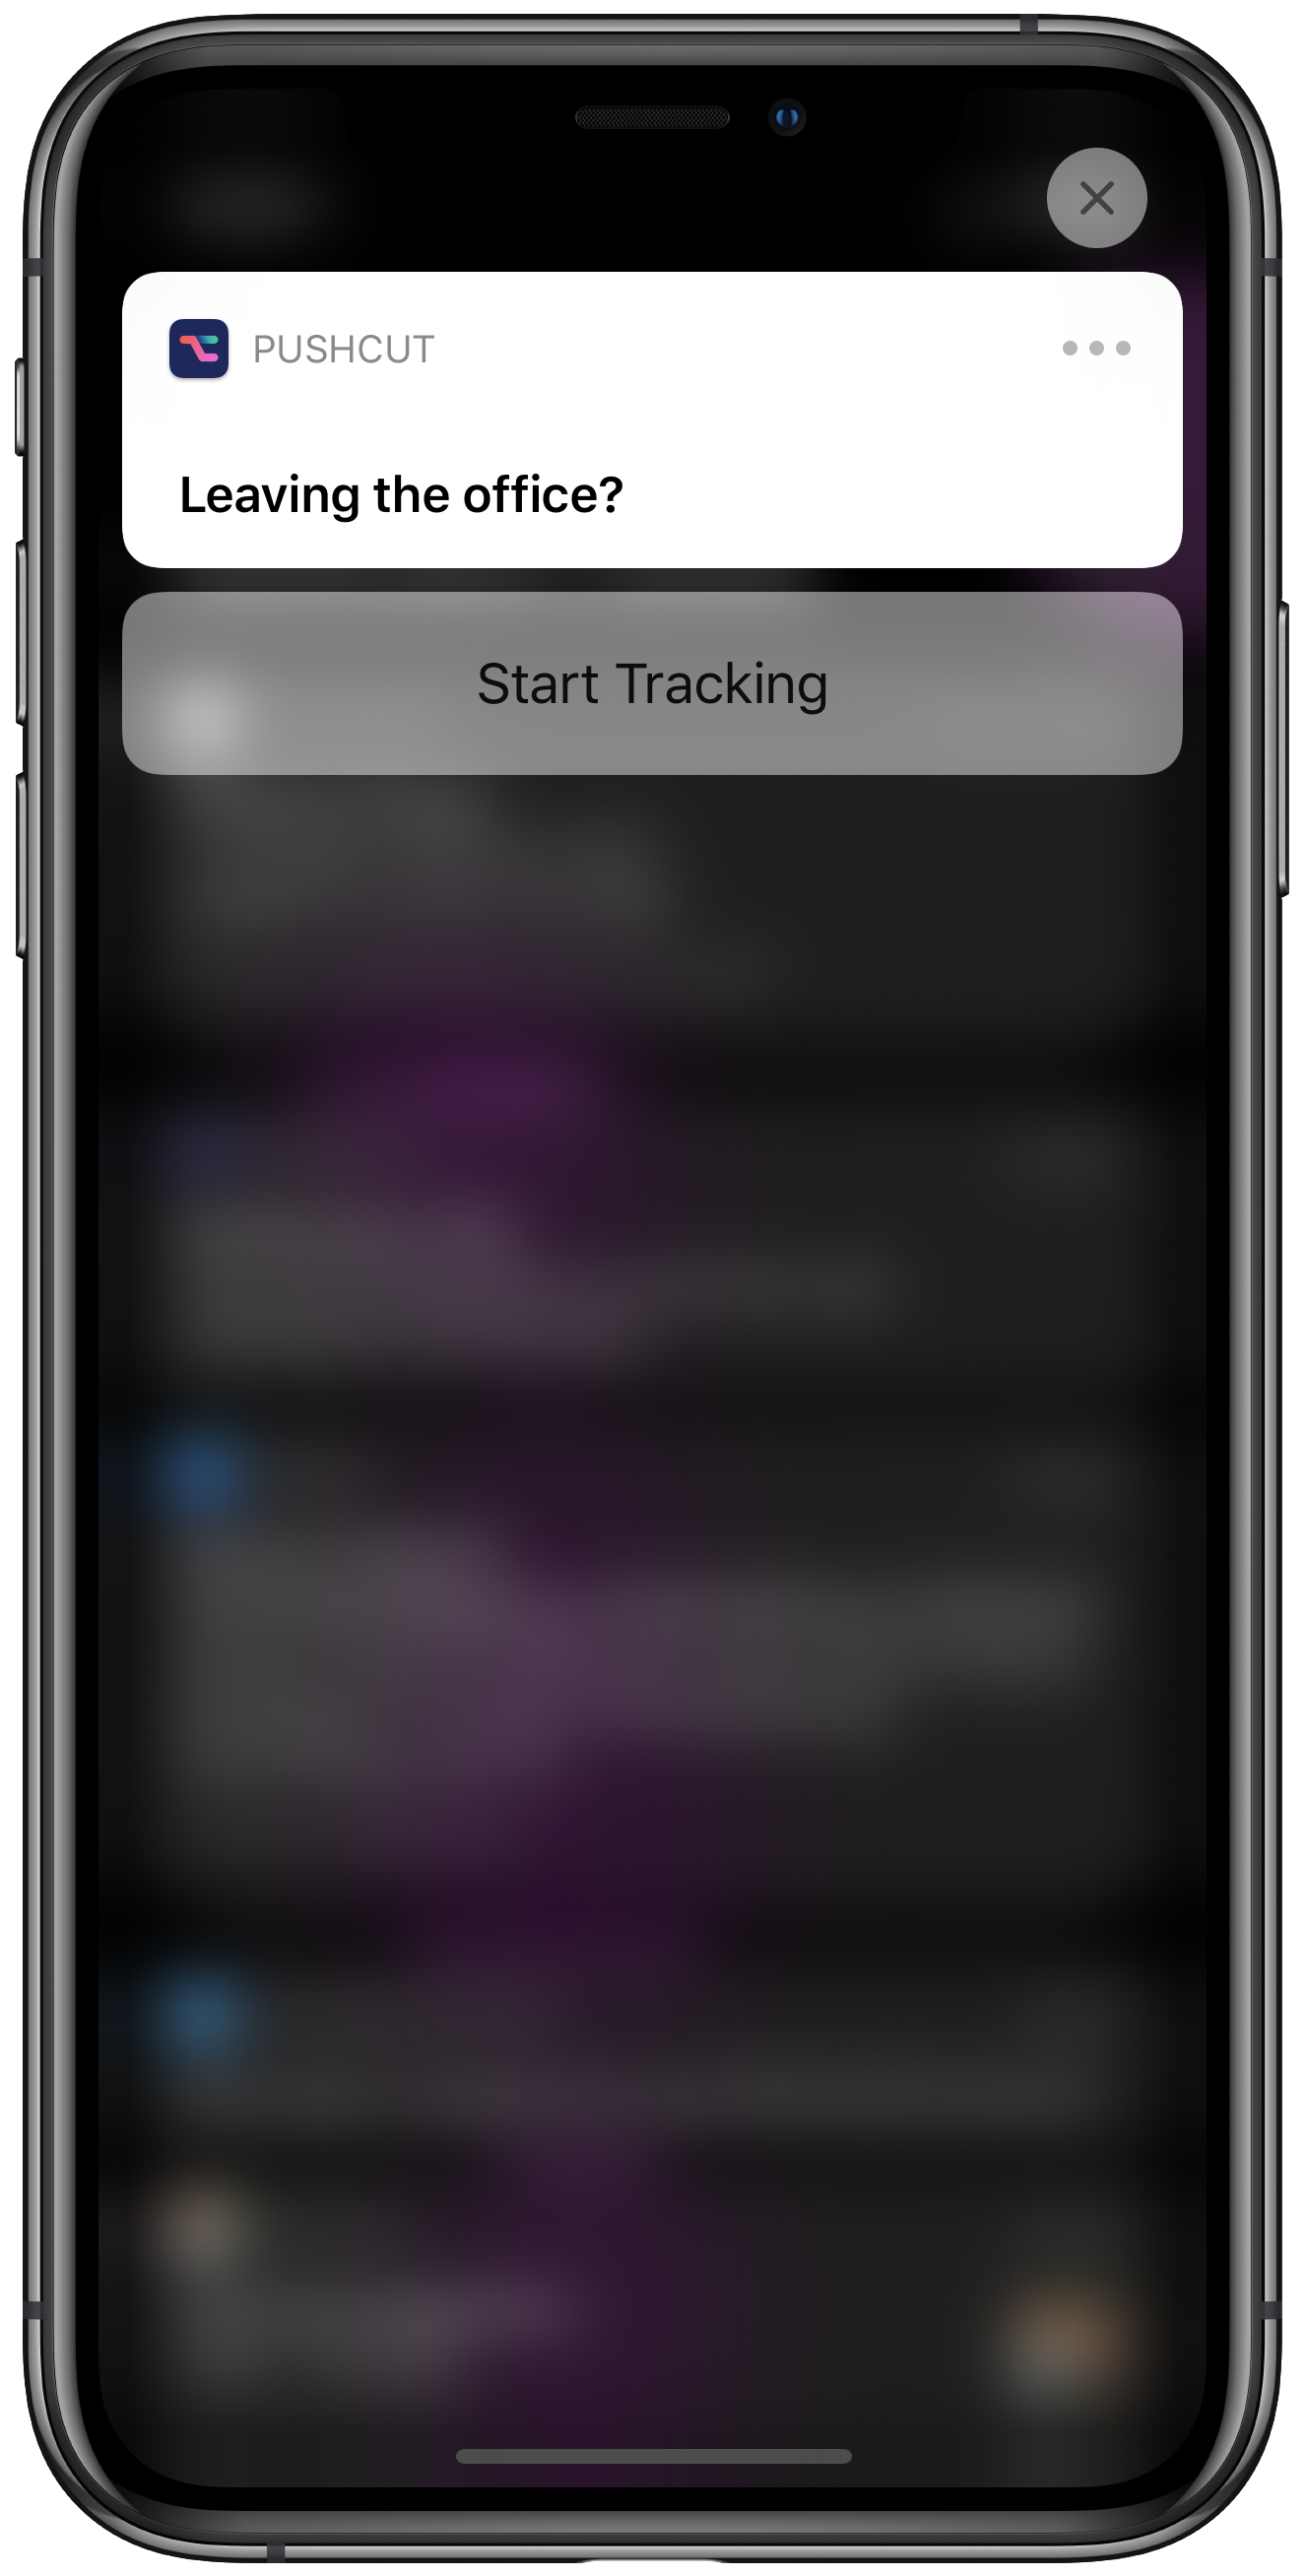
Step 7: The Times They Are A-Tracking!
All done! Whenever you leave the office you will be reminded to start your commute Toggl timer.
You can use the Test Notification feature in the notification editor to make sure your online action works without actually leaving the office.
Want more?
You can also use Make to trigger a Pushcut notification using the Send Notification action.
With a Pro subscription you can pass in dynamic texts, titles, and Input parameters.
Notification inputs are forwarded to online actions, and you can use them inside your triggered Make scenario.
For example, you can setup Google Calendar-based notifications that pass a Toggl timer name as Input. When you tap the Start Tracking action, your triggered scenario can pass the Input into the Toggl action - pretty powerful!
Check out the other guides and see our Support page for more information.