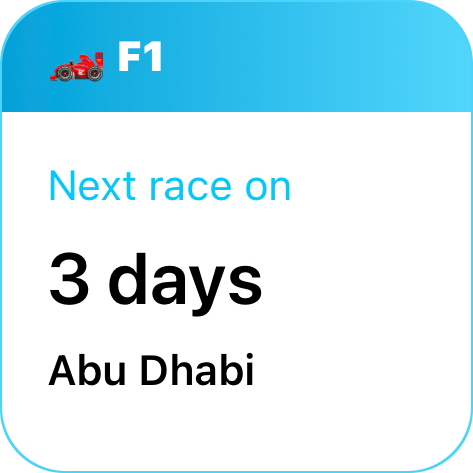
Formula 1 Widget
Mix Shortcuts to access online APIs with Pushcut Widgets to display a countdown of days to the next F1 event.
Step 1: Create the F1 Widget and its Content
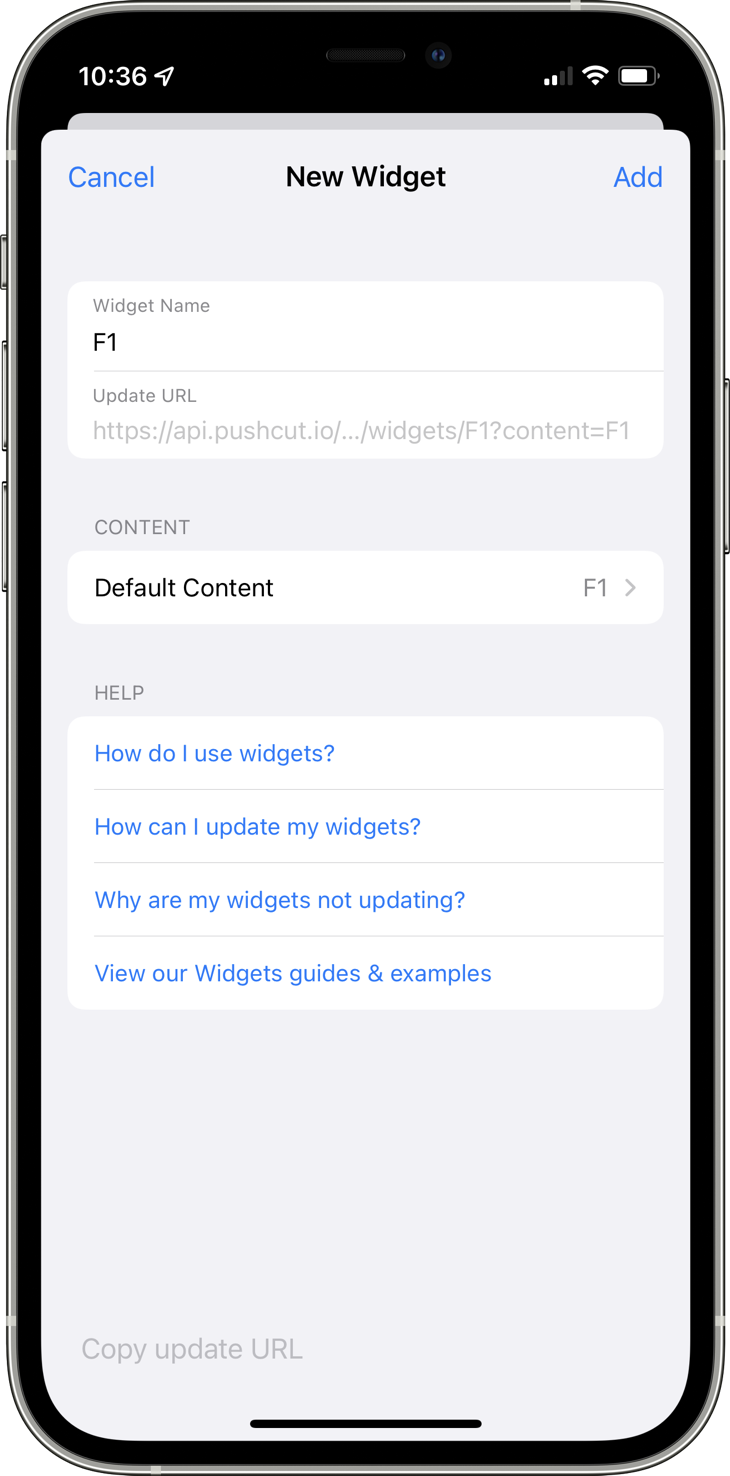
Create your F1 Content by importing the provided JSON. Learn more about how to do this on our support page.
Then, create a new F1 Widget and set its default content to your new F1 Content.
Step 2
Step 2.1: Create a shortcut to update your widget
Import the F1 Widget Update shortcut on your device using this link.
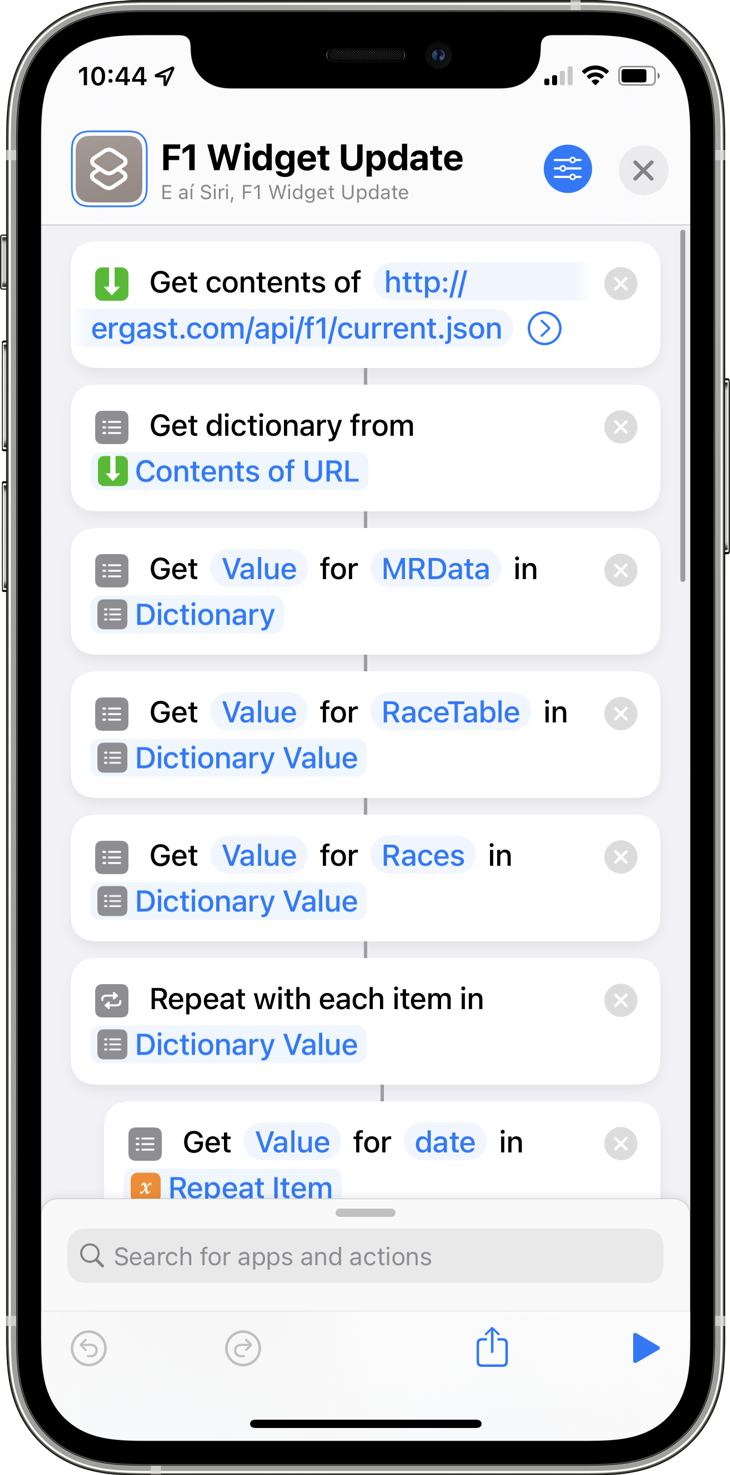
This shortcut uses the Get contents of URL to get a JSON string of F1 next events from the Jolpica website. This data can be converted to a dictionary using the Get dictionary from input action.
Then, using multiple Get value for key in dictionary actions, we dig through the dictionary to get to the list of races contained in "MRData.RaceTable.Races"
Step 2.2: Create a shortcut to update your widget
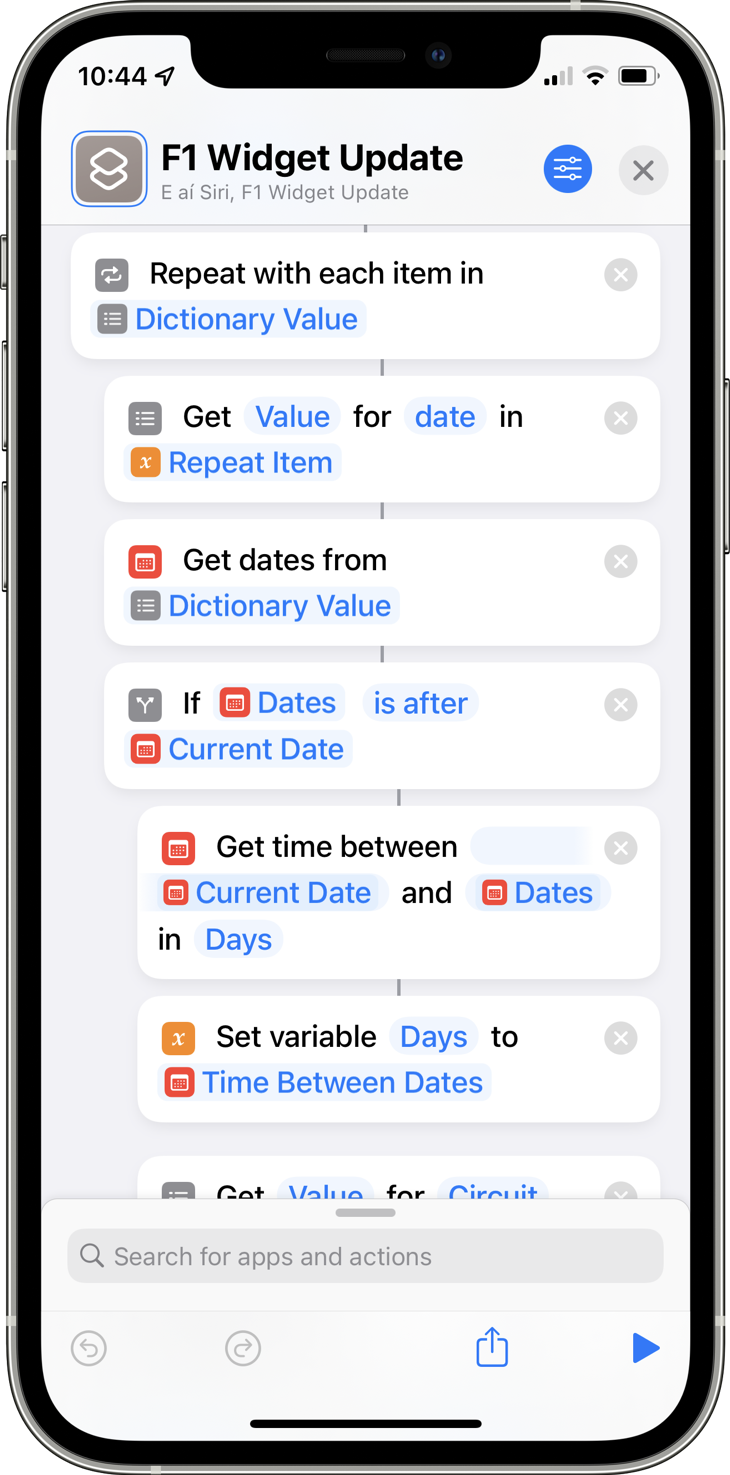
As the races value is a list, we need a Repeat with each item in list loop to get each values' date nd check if it's the next race.
Once we find the first race that's happening after the current date, we use the Time between dates action to calculate the number of days until the next race. And we've added an extra Get value for key in dictionary to get the name of the next circuit.
Both variables (time to next race and circuit name) are then added to a list that's passed to Pushcut's Update Widget action.
Tap on the play button on the bottom-right corner of your screen to test and see if everything is working! Keep in mind that, because of how iOS controls widget updates, it may take a while (up to 15 minutes) before the widget is actually updated.
Step 3: Setup your daily automation shortcut
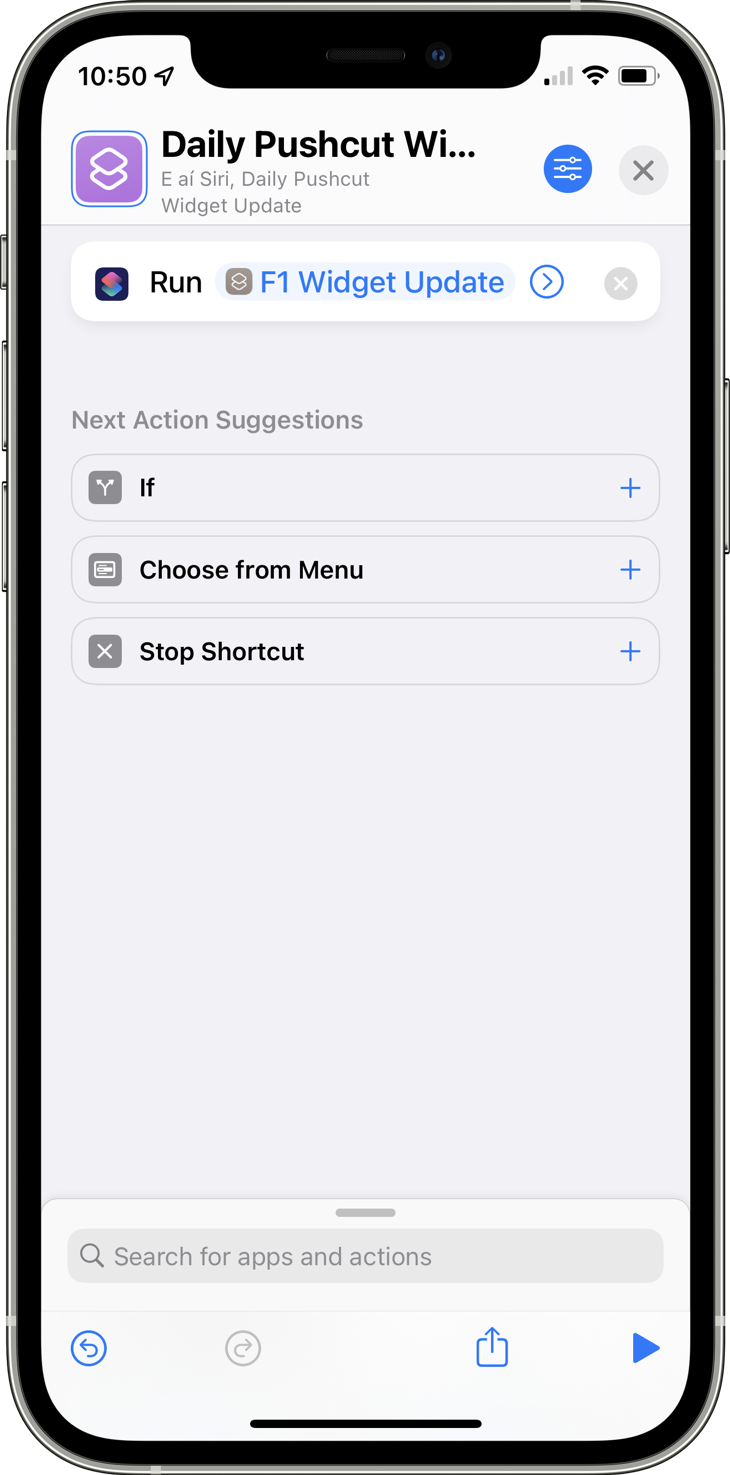
To avoid having to create many repeated automations to update your widgets, let's organize all shortcuts that should run daily on a "parent shortcut" that will execute all its children.
Create a new Daily Pushcut Widget Update shortcut, choose the Run Shortcut action and choose the F1 Widget Update shortcut you just created.
Step 4: Creating the automation
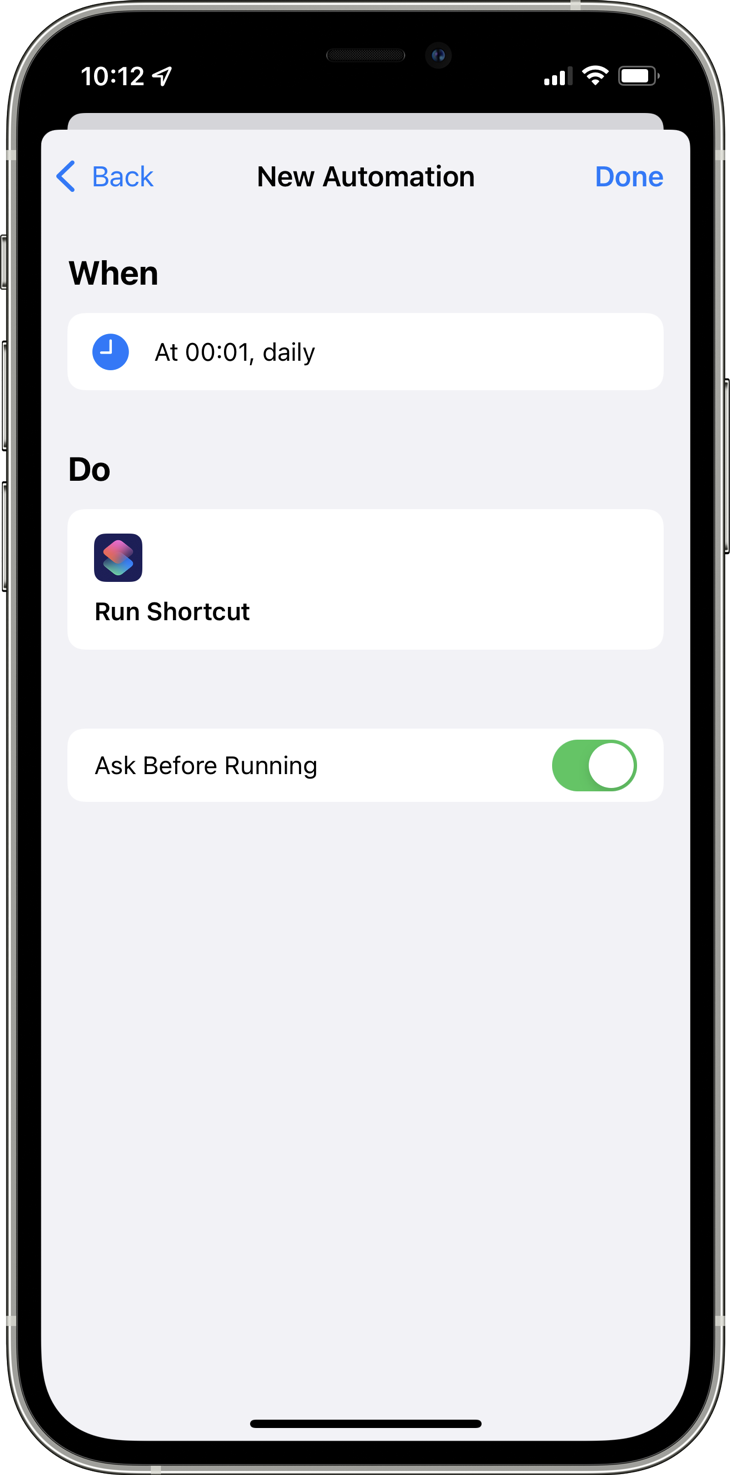
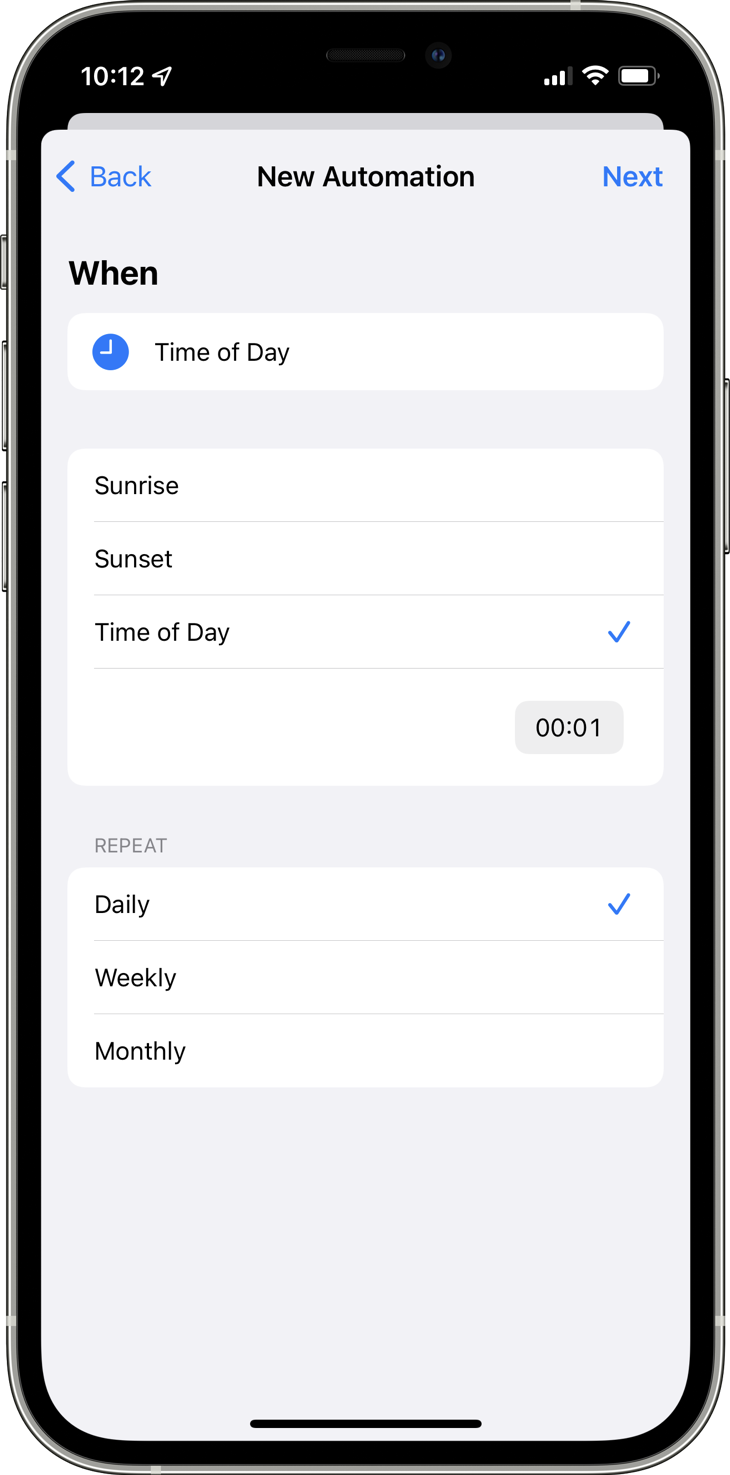
Using the Shortcuts app, create a new Personal Automation that runs on a Time of Day.
Since this automation will run only once per day, you can set it to execute at 00:01 am. Make supported to leave the Daily option checked at the bottom.
Step 5: Setting up the automation
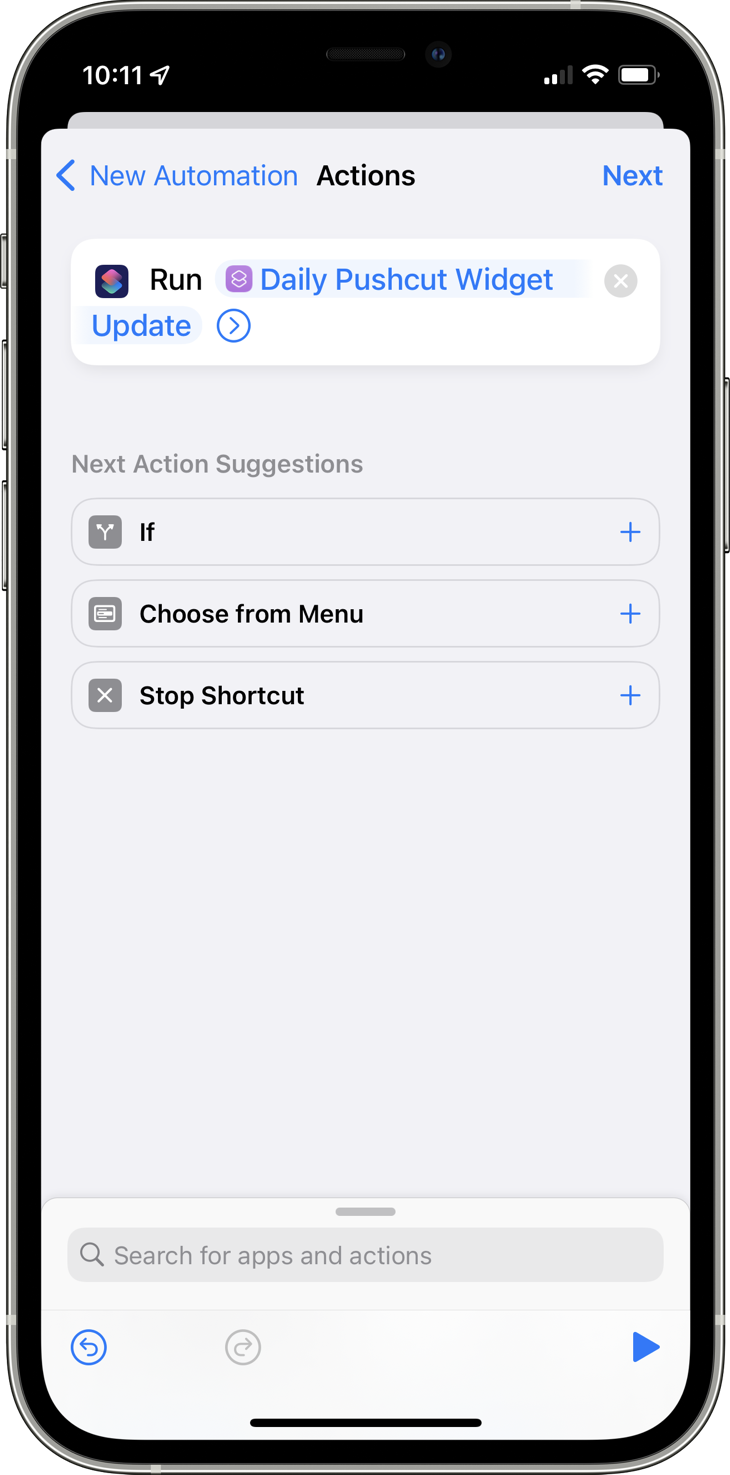
Choose Run Shortcut as the action for your new automation and pick the Daily Pushcut Widget Update shortcut you just created.
If you need to update other widgets once a day, you won't need to setup another automation: just add another Run Shortcut action to the Daily Pushcut Widget Update shortcut.
Step 6: You're all set!
Your automation is done and your widget should now be updated once a day at 00:01 am! Make sure to disable the Notify When Run before closing this screen. This way you'll avoid cluttering your Notification Center with a new notification everytime your automation is executed.
